
If you ever tear, rip, or puncture your pond liner don’t panic! This can easily be resolved in a few simple steps:
- Get another piece of rubber liner big enough to go over the problem area by at least 2 inches all around.
- Drain the water 12 inches below the problem area, exposing it and make sure the area is clean and dry.
- Use the prep solvent that comes with your liner repair kit (link to Amazon) and generously clean the area again. This will remove any fine dirt that may have been missed in the initial cleaning.
- The MOST important thing, be sure all the wrinkles are out of the liner where the repair will be made. Wrinkles will cause leaks.
- Apply the sealant around the area, a bit larger than the patch.
- Gently apply the patch over the area and apply pressure all around to be sure of a good seal. (No Wrinkles)
- Allow the sealant to cure fully, then refill your pond.
My Story
I’ll never forget, I had just finished placing my last rock. I was beaming with pride. I could tell I was driving my family crazy with this project. It was all I was talking about for weeks. Now was the moment of truth.
I gathered my wife and kids around to witness my glory! I asked for a drumroll as they all reluctantly participated. Plugged in my waterfall and BAM! Just like that I had my very own waterfront property!
I couldn’t stop smiling. All those days of back breaking work, digging and climbing in and out of a deep hole all behind me now.
Something Was Wrong
As I looked on with pride, I noticed something. The water level going into my skimmer box was lower than it was when I had started everything up. This must be because water in the waterfall system caused my level to drop.
Was I crazy? I could feel the doubt in my mind beginning to set in. As I looked on, the water level slowly but surely got lower and lower and lower.
I started to get that sinking feeling in my stomach. You know what I’m talking about. Like the feeling you get when you are called on in class to give your presentation, and you didn’t even start it yet.
Starting Over
Well I thought, “back to the drawing board”. I shut off my waterfall pump and began to retrace my steps. How could i be losing water? I know I didn’t tear my liner when i was building this thing. I was told that it was ok to walk on the liner while it is being installed as long as rocks are not “ground” into it.
Then it occured to me what may be happening. When I calculated my liner I didn’t have enough to go all the way up to where my waterfall unit was located. Keep this in mind when you plan out your pond.
The thing is the liner I got would have worked with my original plan, but as I went this project got bigger and bigger. You’ll see when you do your project. Things change and you just need to adapt to them and make them work.
My Pond Liner Setup
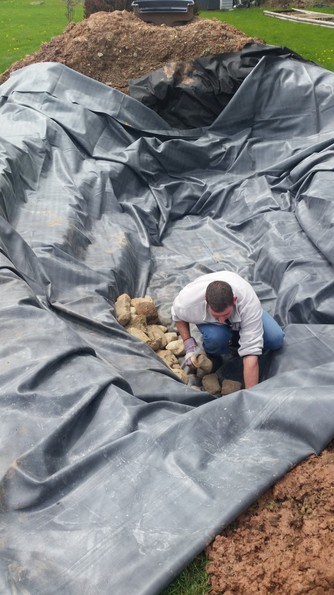
I took the liner from the main pond up as high as I could to my waterfall unit. Then I had to get an additional piece of liner and overlap the two. This should not have been a problem as long as the liner coming down the waterfall was on top of the liner making up the pond.
The two liners were like shingles on a roof. I didn’t use any type of glue or sealant to fuse the two together. The liner making up my pond was above the ponds water level by about 2 feet, with the additional liner overlapping it and going below the water level in the pond by a foot.
Now normally this shouldn’t be a problem. As long as the liner is overlapped properly all the water should stay in the pond.
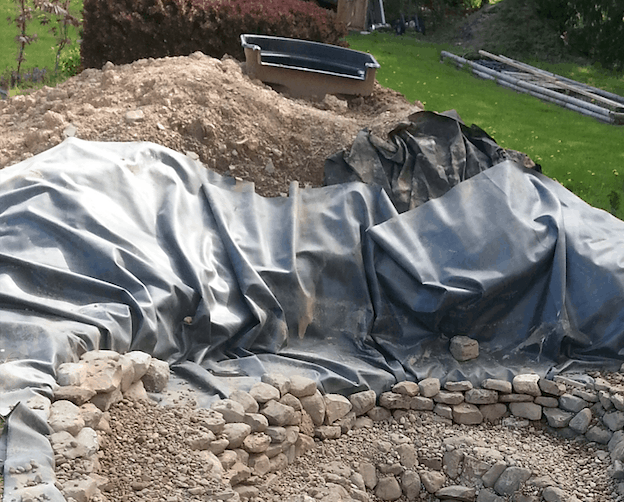
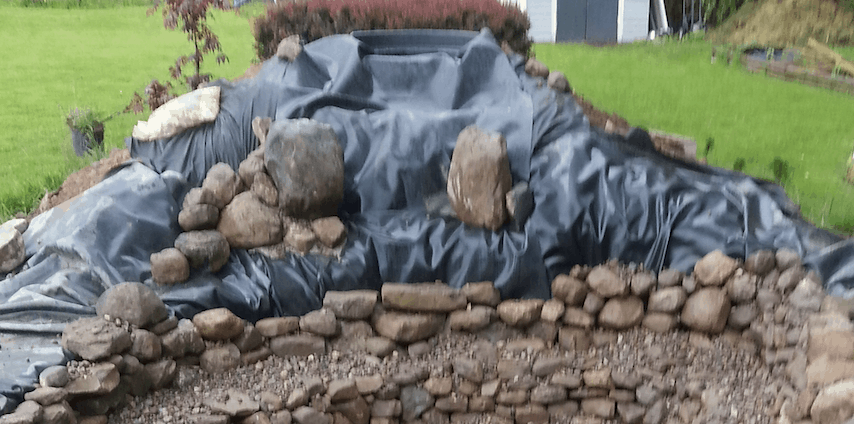
As you can see from the pictures below the original pond liner only goes halfway up the waterfall mound.
Get To The Root Of The Problem
As I investigated further, I saw what was really going on. Since I had modified my plans a bit, the only readily available liner to make my waterfall and stream was only 3 feet wide. This is fine coming straight out of my waterfall unit, but as the water cascades down the falls it gets wider. Water was flowing past my 3 foot wide liner into the ground before it ever got to where the two liners overlap.
Urrg… this was going to take some strategic rock placement and waterfall foam to correct.
Guided Waterfall Stream
Waterfall foam (link to Amazon) is your best friend when it comes to making water move the way you want it to. I needed to create a dam to control the water from running off the liner. If you run into issues like this use waterfall foam and disguise it with small rocks before it cures. This corrects the problem in the most natural looking way.
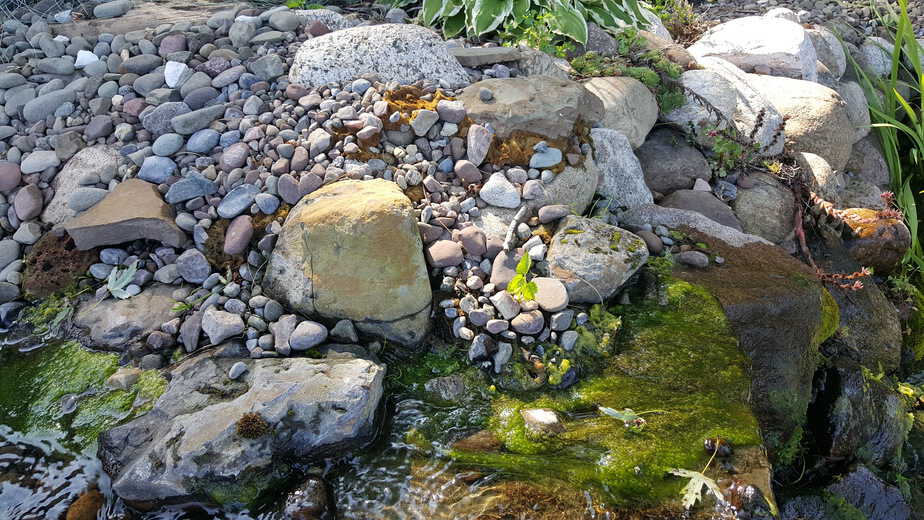
Waterfall Foam 3 Years Later 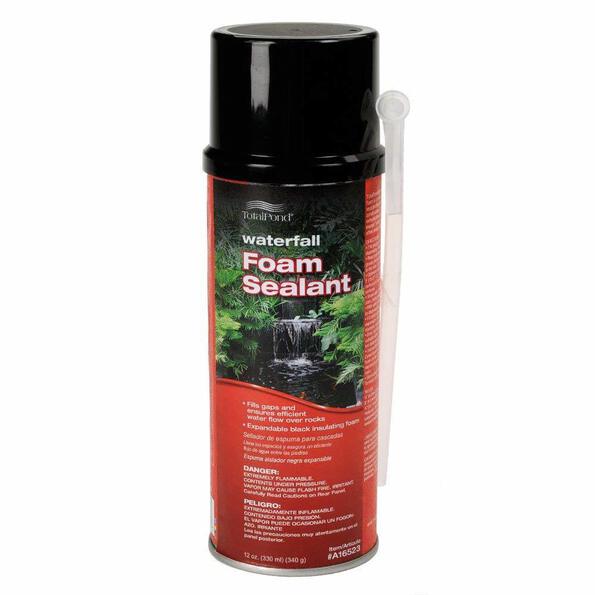
I was sure to let the waterfall foam set up for 24 hours, then started everything up again. This time with a lot less fan fair. I let the system run for another day and to my delight the water level never went down.
In conclusion
Fixing a pond liner is not that difficult once you find the problem. This can be a challenge all on its own. Follow the 7 steps and don’t freak out.
Sometimes you need to step back and see the big picture. Things aren’t always as they seem. What you think is the culprit, may not be.
I would love to hear some of the challenges you are facing with your projects. Please comment below and share them. Your solution may help someone else. Until next time enjoy your backyard water garden!
~Jeff



Hi Jeff, thanks for sharing! I’ve been planning on installing a pond in my backyard and I’ve been researching all the maintenance, I’m glad I have this article to look back on if my pond liner ever tears or rips. I have also read that you can put sand down before laying the liner down to prevent ripping, I would love to hear your input on that?
Sand is great to reduce the possibility of tears in your liner. You could also use old carpet as a barrier. When you do get your pond project started just be sure to use geotextile underlayment directly under your liner. Whether you use sand or not the underlayment works great for preventing stones and roots from reaching your liner. If you use a pond kit for your project the underlayment is included. Best of luck on your future project!