The Pondless Waterfall
The pondless waterfall is exactly what you need if you have ever thought about putting a water feature in your outdoor space. After researching all that is involved with pond ownership realize that it’s tons of work? Your life is busy and finding the time, energy and money that goes into digging and maintaining a pond is almost unimaginable. That’s where the idea of a pondless waterfall comes in.
There are a couple of ways to approach this. If you are looking for a simple plug and play type of solution, then a backyard fountain may be enough to satisfy that craving for bringing another dimension to your space. However, if you are like me and want a more natural feel, then the pondless waterfall is exactly what you are looking for.
Keep It Simple
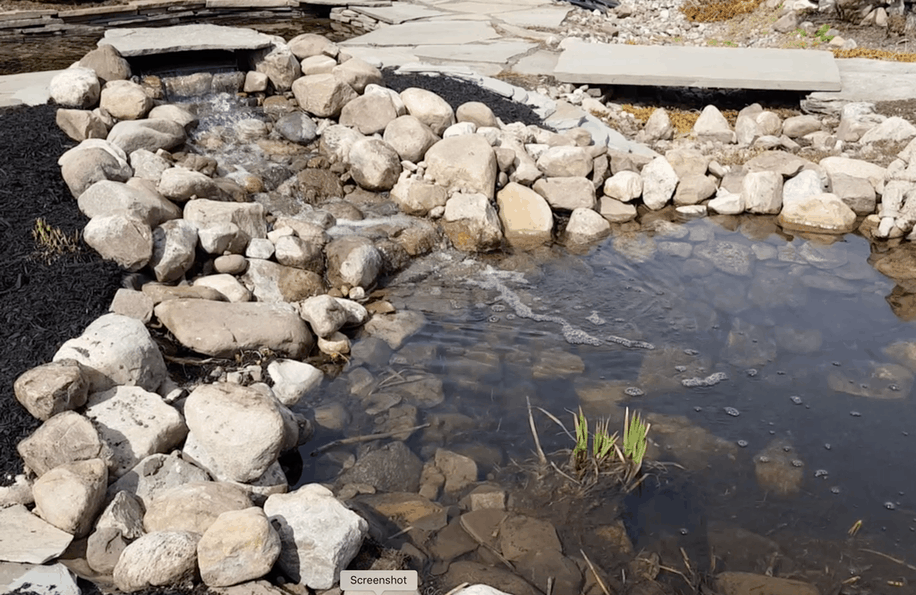
Much of the hassle of a conventional pond and waterfall setup can be eliminated. The digging is minimal and the maintenance that goes along with pond ownership is almost completely eliminated as well.
Come Up With a Game Plan
So let’s begin this project the way any project should begin, in the planning stage. This can be the most difficult to do if you have a tough time making decisions. Location is the key. Not only do you want your new waterfall and stream visible, but you also want it within earshot of your normal outdoor gathering place.
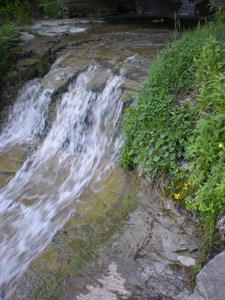
A stream with rushing water is one thing, but if a waterfall is added it’s entirely something else as far as sound is concerned. I had no idea the impact a waterfall had on the noise, even in the outdoors. The white noise it creates almost completely eliminates any other sound from the space. This is important to keep in mind when choosing location.
I have noticed from personal experience that conversations around my waterfall are somewhat private. The sound of the water eliminates the chance of someone eavesdropping in on what you are saying. Just keep this in mind if you plan on a roaring waterfall next to your outdoor dining area.
Flow or Fall
When going the pondless route, you may not find a need for a waterfall at all. Just the mere sound of water winding down over the rocks to its destination is a tranquil sound that won’t completely disrupt the atmosphere, and adds a bit of seemingly natural ambiance to the space. The above image is a stream at a venue for a wedding. It creates a beautiful backdrop without completely taking over.
Once you have decided what you want, and where you want it, it’s time to lay out your project. Use a garden hose to outline either side of your waterfall or stream. Move the hose around until it looks exactly the way you want it to.
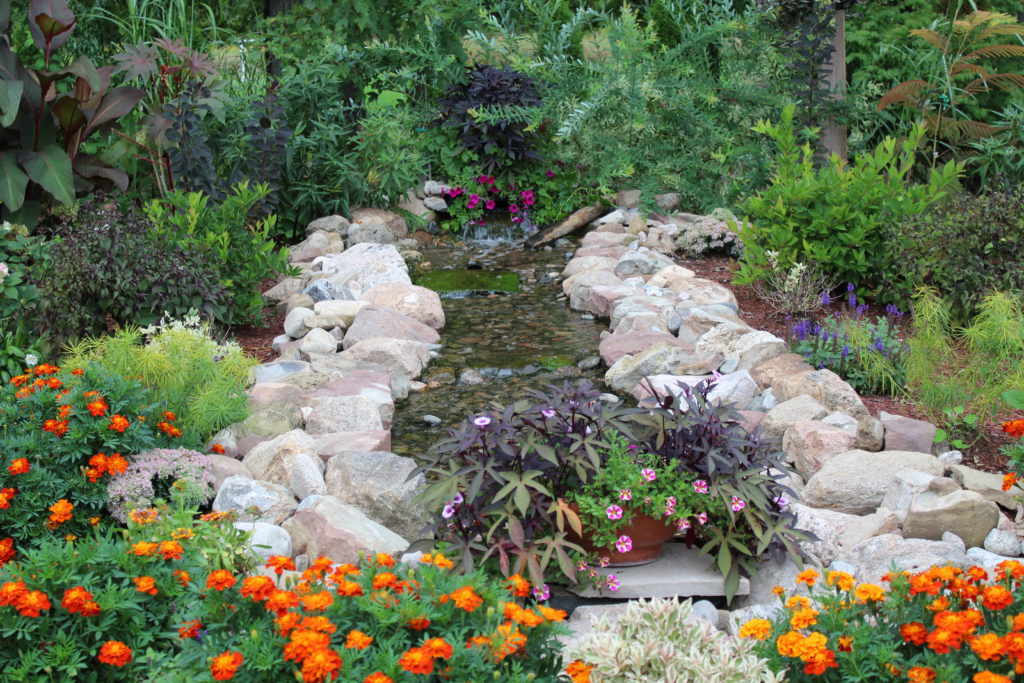
The basic design of a pondless water fall is a waterfall unit or spill way, the water then flows down your rubber liner into a reservoir where it is then pumped back up to your spillway unit. Be sure there is a correctly grounded power source near the reservoir.
Hammer Out the Kinks
How the water flows from one end to the other is entirely up to you? There could be a steep cascade and then an area where the water can pool before dropping down again. Or it could simply rush from your spillway to your reservoir without dropping off at all. This is all in your vision and design.
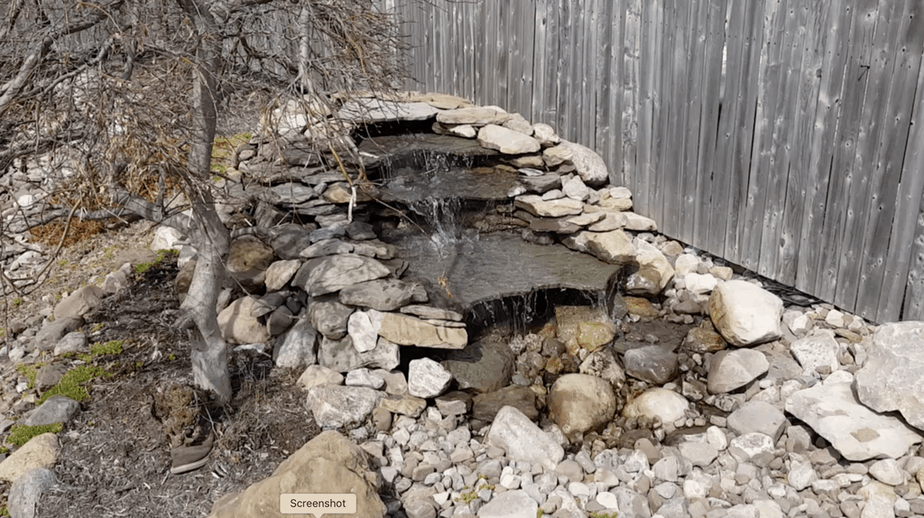
If your goal is a robust waterfall with ledges and spill overs, then you will need to increase your elevation from start to finish. If you are starting with level ground this could be a challenge. The higher your waterfall the deeper you will need to dig to provide the right amount of excavated dirt for your drop off. Or you could order a few yards of top soil to help with raising the elevation.
When In Doubt Improvise
Instead of using dirt under your starting point, stacked cinder blocks work very well. When they are placed on undisturbed ground they will settle very little. You could use them throughout as you step down from start to finish. Be sure to put a thin layer of dirt, or even a piece of old carpet over top of them to act as a cushion between the blocks and the liner.
Although the rubber liner is very durable, I would rather not take my chances with a tear due to the liner rubbing on the course cinder blocks.
If you are starting on level ground, you will create a pitch by placing the dirt you excavate from the reservoir to the start of your stream. If your plan is to incorporate a waterfall, more dirt may need to be brought in. Keep in mind, dirt that has been freshly disturbed is going to settle, so compact it as you go as best you can.
Crunching the Numbers

The rule of thumb for the size of your reservoir is to have three times the volume of water your stream and waterfall hold. This will ensure that your pump doesn’t take on any damage due to it running dry. To calculate water volume, the formula is Length X Width X Depth X 7.5 = water volume in gallons
Here is an example: For a 3’ wide stream that is 20’ long with an average depth of 3”
3’wide X 20’length X .25’ (3inches) deep X 7.5 = 112.5 gallons of water in the stream and waterfall
112.5 X 3 = 337.5 gallons of water in reservoir
In the case above example the reservoir would need to be approximately 48 cubic feet. This is calculated by taking the gallons of water in the reservoir and dividing by 7.5. Dig a hole with the dimensions of 6’wide X 4’long X 2’deep and it would offer a 360-gallon reservoir. It is better to be oversized than undersized.
Go All In
Ok, you know how much liner you will need, it’s time to order your materials. If you do this now before you break ground, there is a good chance everything will show up right when you are ready for it. You can purchase precut liner in various sizes, just don’t forget to order the geotextile underlayment to go with it. This helps protect the liner from shifting rocks and roots underneath the liner once it is in place.
Your best option is to get a pondless waterfall kit. This way you can be sure all of the pieces are sized right and will fit together perfectly, and you won’t forget anything. Here (affiliate link to Amazon) is the best place to get one of these kits.
You can purchase these items one at a time, that’s fine too. Here is a list of what you will need for a typical installation:
Typical Parts List
- Pump
- Filtration
- Pondless Waterfall Vault
- Pondless Vault Extension
- AquaBlox (or gravel for a reservoir)
- Waterfall Spillway
- Lighting – (optional, but recommended)
- Return Hose
- Liner – 45 mil EPDM
- Underlayment – Geotextile – protects liner from sharp objects
- Components – Pump Check Valve Assembly, all necessary fittings and
- Silicone sealants
Now that you have all of your dimensions figured out and you’ve decided on a location it’s time to get to work. Place your waterfall filter unit or water diffuser at the desired height you wish your stream to start. Get it close to level but don’t worry about getting things perfectly level at this point, we will do that in a later step.
Use a can of spray paint if possible and paint an outline of your project. Remember before you start any project be sure the area is void of utilities. Call before you dig.
Here We Go
Begin to dig, starting with where your reservoir will be. As you dig, place the excavated dirt at the opposite end of your project, creating an elevation for the water to move through. If your design is going to be similar to a mountain stream, then there will not be much elevation required.
The pitch can be as gradual or as steep as you wish, but there needs to be one. No less than 1 inch drop over 4 feet. For a 20’ stream you would need to drop at least 5 inches at the very minimum from start to finish in order to keep the water flowing.
As you dig your stream bed you also must dig a trench alongside the bed to place your return line. This small trench only needs to be a little wider than your return line, and I would recommend a depth of at least 8 inches. This trench needs to go from your reservoir to where you place your diffuser.
Time To Put The Pieces Together
Once you’ve excavated the dirt and are happy with the pitch it’s time to be sure your stream is free from rocks, roots or any other sharp objects that could possibly puncture your liner. Now place your underlayment into the stream. It should be placed wherever the liner will lay.
Now place your liner into your river bed. It’s ok to walk on the liner. Remove as many wrinkles as you can. This could be difficult depending on the shape of your design. You don’t need to get all the wrinkles out the stone will hide them in the next step.
Take notice that when you place your liner there is excess of 8”-12” on all sides to allow for proper water containment. The bank of your stream and the reservoir need this as well to be sure no water is lost when the feature is on.
Get The Right Gear
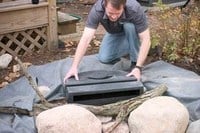
If you are using a typical water diffuser for the outlet of your pondless falls, then all you need to do is be sure it sits lower than the liner surrounding it. Don’t worry about how it looks, this will all be taken care of in the next few steps.
I would recommend using a diffuser as opposed to a waterfall filter as the water outlet, just because it would be much less maintenance throughout the year.
Does Size Really Matter
Depending on the size and scope of your project you may find it beneficial to use two separate liners, one for your waterfall stream, and another for your reservoir. Be sure that if you go this route the long stream liner goes into the reservoir liner and they overlap by a couple of feet. You could also seal them together for extra insurance.
Now that the liner is in place it’s time to create some empty space in your reservoir. This can be done using large gravel, or the more efficient and cost effective way is to use Aquablox. These polymer blocks can be used to fill the void allowing the maximum volume of water in your water feature system. Use as many as necessary to fill the void.
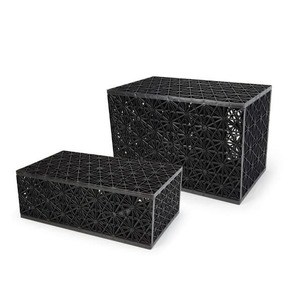
At this point you will also need to put your pump housing in place. If you use a pondless waterfall kit, then the pump housing and Aquablox will connect together assuring proper operation. Be sure the top of the pump housing is above grade so it doesn’t wind up under water if things ever flood out. Use gravel or large rocks to level and get your housing to the desired height.
Putting It All Together
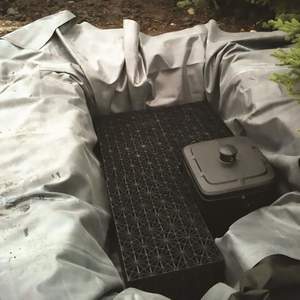
Now it’s time to hook everything up before we start to rock it all in. Connect your return line to your pump and run it in the trench you made alongside of your stream. Connect the other end to your water diffuser at the top of your water feature.
Go ahead and tighten all of your connections at this point. We will be testing our system once we get our rocks in place.
Be One With Nature
Perhaps before you start to rock your stream or waterfall bed, take a walk in the woods and notice how nature is the perfect architect. There are no perfectly straight paths. Creeks and streams are usually framed in with larger rocks and boulders.
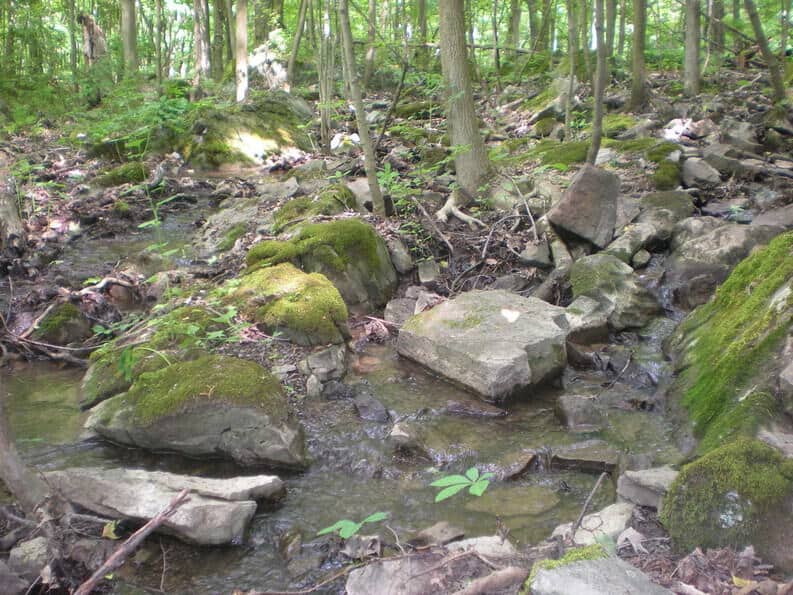
By doing the same thing in your project, you will create interest and make your feature more appealing. Starting at the top of the stream where your water diffuser is, begin to rock your stream bed. Begin with the larger rocks and frame in the way you wish the water to flow.
Place larger rocks in the center of the stream to add interest and give the water something to flow around just like in nature. Once you’ve framed in your stream it’s time to cover all the remaining liner with the river gravel (I usually use river rock that is native to my part of the country for a natural look). When you are placing your rocks, remember to try and mimic nature.
Waterfall Creation
If you are adding things to your feature like waterfalls and drop-offs, the key to this is to find the right spill rock. I use a piece of slate which works very well. When setting your spillway, start from the bottom up. Stack up rocks under your spillway. Use waterfall foam to help hold everything together, but don’t completely rely on it.
Your stacked stone should be able to stand on its own without the aid of the foam. When stacking stone, it is a good practice not to let any vertical seams go more than two courses high. This practice will add a lot of stability to your stonework.
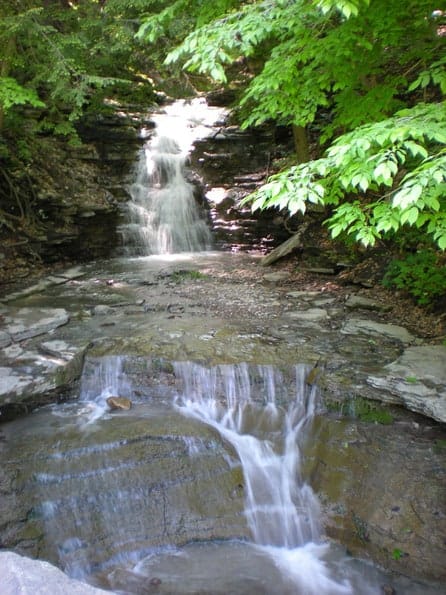
Once you’ve built a level solid place for your spillway rock to rest put it into place. Check that it is level and slightly pitched forward to encourage the water to flow in the desired direction.
The biggest problem with spillover rocks in a stream is the fact that most of the water will tend to flow behind your spillover rock rather than over it. To avoid this use waterfall foam between the spillover rock and the liner. After you spray the foam, immediately place rocks and pebbles into the fresh foam to disguise it. This provides a great barrier to force the water in the right direction.
Merrily Down The Stream
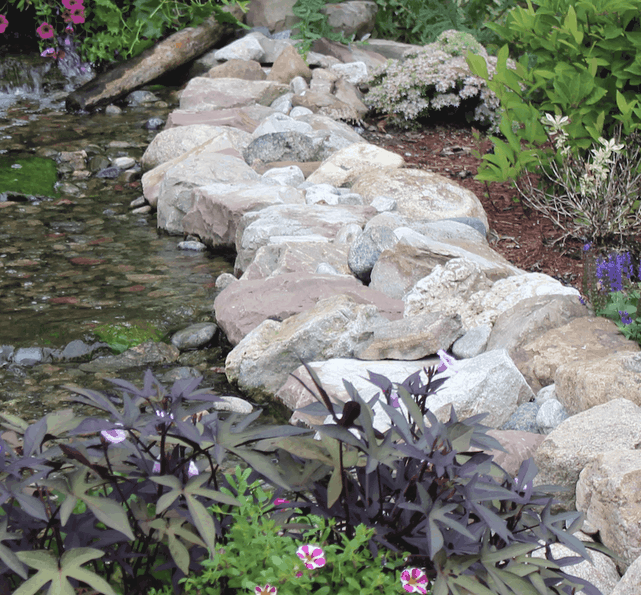
Make your way down the stream covering the liner with rocks and pebbles. Make things look as natural as possible. Don’t worry about the liner that is past the border of your stream. That will be dealt with when we do our plantings in a later step. Stop when you get to the reservoir.
Clean It Up
Now it’s time to take a break and wash everything down. I used a dirty water pump for this process. If you don’t have one they can be rented relatively cheap. I knew I would use mine more than once so I purchased one.
Place the pump at the lowest point in the reservoir and begin to wash everything down. As the reservoir fills up, pump out the dirty water. Doing this will save you wear and tear on your waterfall pump. Keep rinsing everything down until the water is clear. It may take a while, and don’t worry about getting every last bit of dirt either. Just get most of it. When you are done, pump out all the water from the reservoir and remove your dirty water pump.
With your rocks and stream all rinsed off its time to fill in the reservoir around the Aquablox. Be careful not to move them as you fill around them. As they sit, they should be well below grade so getting rocks and gravel beneath them could cause problems down the line.
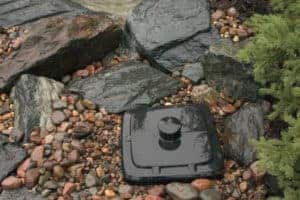
Add gravel until the Aquablocks are covered being mindful not to get gravel into your pump housing. With everything rocked it, now comes the fun part. Begin to fill up your reservoir. Do NOT turn your pump on until your reservoir is full. Running a pump dry will burn it up. Keep filling until the water level is a few inches from the top of your pump housing.
The Moment of Truth
Now gather everyone around for the moment of truth! Perhaps a drum roll may even be required. Plug in your pump and stand back in AWW as the space you’ve created comes to life. At this point sit back and relax a bit. You should let your new water feature run for at least 24 hours just to be sure there are no leaks or issues.
Once you are confident everything is up to par, it’s time to do all the finishing touches. Let’s start with trimming the excess liner from the edges. When doing this it’s important to leave a little extra just in case things settle and shift over the course of the seasons.
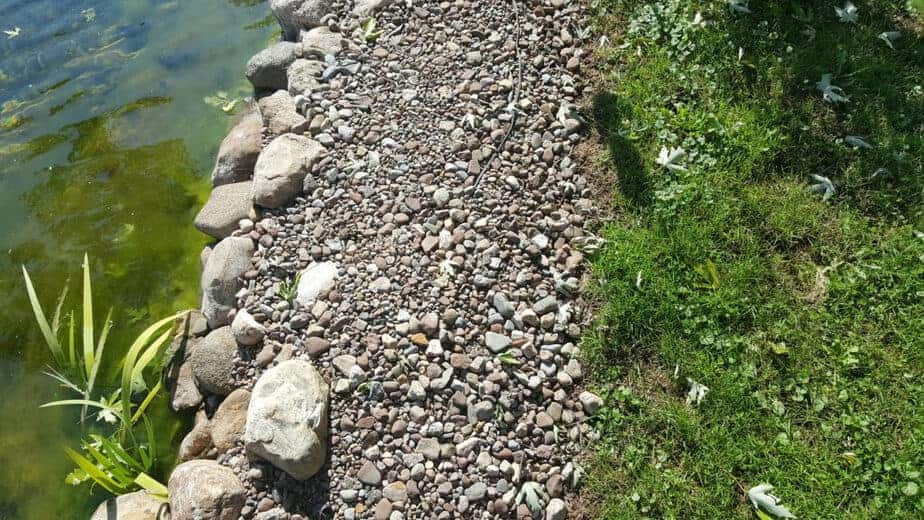
The liner can be hidden fairly well by sandwiching it between rocks on the side closest to the water, and dirt on the backside. Then whatever is sticking up can be trimmed off. The key is to be sure you don’t put the liner lower than your water line. If you do, water could leak out of your feature and your pump would run dry.
Another trick to hiding the liner is to add a planting where the stone meets the dirt. This is great camouflage and adds a natural look to your whole feature. See some of our other articles for lighting tips and other ways to finish the edge.
In Conclusion
So there you have it. The pondless waterfall (link to Amazon for the best price) may be exactly what you have been looking for. All the perks of a garden waterfall without the maintenance involved with pond ownership. With the pondless water fall or stream, once its built there is nothing more to do but relax and enjoy it.
Creating your own at home getaway can work wonders on your stress levels, not to mention the pride you will feel by doing this yourself. Just follow the steps and you will get the professional results you deserve. If you found this tutorial helpful, please leave a comment below. Have any questions? Don’t hesitate to leave them below, we love to hear from you.



Hi Jeff,
Thank you very much for the Guide on building a backyard pond and a pondless waterfall. I am trying to decide which one to go for and whether my husband and myself should build it ourselves. It would be great to do it ourselves, providing we can. It would mean that we are totally familiar with it and can sort out any issues as they arise, instead of having to pay someone else to do it. Obviously for the electrics and any necessary plumbing we would need to use experts.
There weren’t as many pictures and design shots for the pondless waterfall and I just wondered why you used links to two different kits supplied by Amazon. Are you saying use either or or was this a mistake?
Many thanks Sandra
There is nothing more satisfying than doing something yourself. Don’t get overwhelmed. Take it step by step and you can do it yourself.
As far as the different pond kits go, both will give you everything you need. Just be sure to get one that is large enough for your space. If you run into any issues check back here.
Before you make your choice between pond or pond-less, understand that a pond will require a little more maintenance than the pondless. Good luck with your project.
Yes, Jeff a great help.
I’m thinking of putting a pond/waterfall in my house.
I may even think about letting some of the pond be outside the house.
Your thoughts….
I love that idea, and it has crossed my mind to do the same. When you bring the pond or waterfall inside be sure you have a way to keep the room properly ventilated. An indoor waterfall will definitely put moisture in the air. This was the concern I had when I was flirting with the same idea. Excess moisture could lead to a mold problem so keep that in mind. I would like to see what you come up with. Having an indoor waterfall is the ultimate water garden. Good luck!
Questions, using the aquascape pondless waterfall system. Pump vault, small aquabloxs, pump and the reservoir at the bottom is 4’ x 5’
1. It says to dig down 18.5” and then put the river rock up to the top opening of the pump vault. Doing this, would leave the rocks wet where the streamundefinedwaterfall enter but dry rocks in the rest of the reservoir. If I was to dig down 23.5” instead but still only fill the rocks up to pump vault top 18.5” for access would this leave the rocks covered by 5” of water. I would do this so the rocks are always wet and the rock colors would stand out. Do you see any problems with doing this?
2. Everything I excavated out and threw up towards the stream build and spillway was a very sandy soil. Though it would will be easy to move around to form the stream and waterfall will it create an unstable base? My only idea would be to wet it down and heavily tamp it before laying down the underlayment and liner. Thoughts?
3. Reservoir, because of a slight slope two sides of the reservoir are about 4” higher then the lowest point one bank. As long as I have the liner going up and over all sides is this fine? I don’t mind seeing 4” of liner on those two sides and I can disguise it with rock or a gravel slope.
I know it’s a lot but I can’t find any of these answers on the web.
Thanks in advance
BRUCE
Hey Bruce,
Let me understand what you are asking. You want to make your reservoir deeper so the entire area is under water? I don’t see any problem with doing this. It would be as if you have a shallow pond at the foot of your stream.
Your soil is sandy and can be easily shaped. This is fine as long as runoff water is not allowed to undermine your feature. The sandy soil could be washed away. Tamping it is a good idea whenever you are disturbing the ground or building it up. It should help reduce the amount of settling that occurs.
You also mention that the reservoir area has two sides that are 4 inches higher than the others. Remember that water always seeks its own level. Having your pond liner go up and over all sides is necessary to contain the water and can be hidden with rocks and plants. The water level will only be as high as your lowest side.
Good luck with your project!
Hi Jeff….this is an old granny here….I have had a plastic for pond for many years now….I decided to rid myself of the maintainence and the mosquitos that love to harvest in it. Question is, I still would like to have the waterfall feature, but convert the pond into waterless. I am trying to figure out how I can do this with the existing pieces that I have.
The pond is 4'X5…not big at all. How do I go about doing this without having to dig up the old liner and make it a overwhelming job? I will be doing it myself, 80 years old…and my husband is 90, so no help from him…hahah
..I thought of lining the existing pool with cut up those long pool noodles, making a space for the pump…and then putting a liner on top of it…But I don't know if that is a crazy idea or not…What do you think and can an old granny do this? Thanks ahead of time.
I have designed my landscaping around this little pond, and this is my go to place to relax and read a good book.